Camera Basics
Filming
- To power on, click the power button
- To record, set to Auto and hit record. When done, hit record again to stop
Uploading to Your Computer
- To export the video, plug the USB cord into the camera (under the fabric hand strap) and then into your computer
- Click the small "Play" ▷ button on the camera
- Open the File Explorer window on your computer and find CANON in the left hand navigation pane
- Open AVCHD > BDMV > Stream
- Select all of your video files (one for each time you hit record) and copy them (Ctrl + c)
- Create a folder on your desktop, open it, and paste the files (Ctrl + v)
Editing & Exporting
- On your computer, open Adobe premier
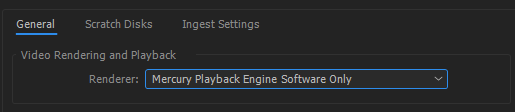
- Create a New Project and then make sure to select Mercury Playback Engine Software Only under the Render drop down. Hit OK
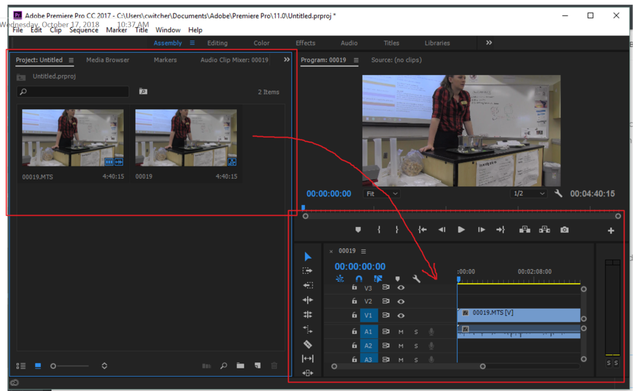
- File > Import... and select the files you placed in your desktop folder
- Drag the files from the left hand Project pane to the the lower right track pane and do any other editing you need to do.
- When you are finished editing your video, File > Export > Media
- Notice that your file will be placed in your Video folder (Open File Explorer > My PC on the left hand navigation panel > Videos)
Publishing
FIRST: Check with your teacher to make sure you are allowed to share this file.
- Save the video file to your OneDrive folder (you can access it by looking in your tool bar by the clock or by hitting the Windows key and typing OneDrive.
- Click on the three dots next to the file and select Share.
- Either enter the email address of the people you want to share with or click get sharing list.
